Personal settings overview

Your Calendly settings let you control personal preferences like your profile, login, calendar, branding, notifications, and privacy. Open Settings from the left nav (or select your photo in the top-right and choose Profile to jump straight to your profile).
Under the Account section, you'll see:
Profile
Has two tabs: General and Login.
- General: Profile picture, name, welcome message, language, date/time format, country, time zone.
- Login: Login email, password, login method (Google/Microsoft/email), two-factor authentication.
Calendar
Has tabs: Calendar, Availability, Advanced.
- Calendar: Connect calendars, choose conflict-checking, set destination calendar, and customize the "What's considered unavailable?" status mapping.
- Availability: Account-level schedule and date-specific availability defaults.
- Advanced: Cross-event-type controls like account-wide meeting limits and holidays.
Learn how to connect and manage your calendar.
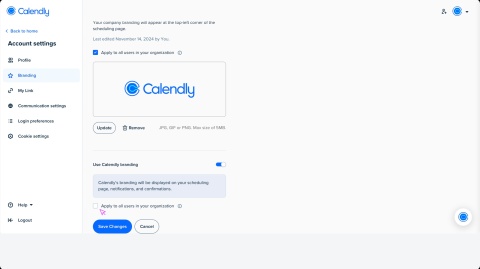
Branding
Upload a logo, apply branding to others (owner/admin), disable Calendly branding (paid plans).
My link
Customize your personal scheduling URL.
Notifications
Manage notification email preferences and phone numbers used in SMS Automations (paid plans only).
Privacy
Has tabs: Booking, Blocked people, Cookies.
- Booking: Email verification settings.
- Blocked people: Manage your block list.
- Cookies: Control which cookies Calendly can use.
Under the Features section, you'll see AI (Callie and Notetaker tabs) and Contacts.
Owners and admins also have an Admin section — see the [Admin Center] article for details.